 Fair warning, I am no accomplished bookbinder by any means, and basically made this up as I went along. It’s a variation on Rosemarie Lütken’s handmade journal.
I decided to combine her method with a more traditional sewn-binding approach.
I can never sew bindings tight enough to avoid gaps between the signatures (a pet peeve of mine!). Rather than wrapping around the cover, I decided to sew directly to a spine. This worked great, as it not only closed the gaps between the signatures, it eliminated the torn holes and other woes I have encountered with past binding projects.
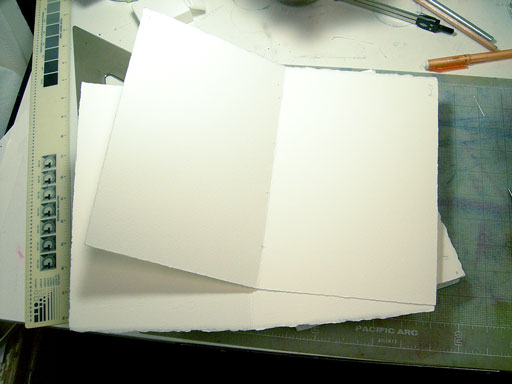
So, to begin! First, the signatures. I chose a variety of 140lb CP watercolor paper. 16 pieces of 9″ x 12″ papers, each folded to 9″ x 6″. I folded them together in pairs to make 8 total signatures.

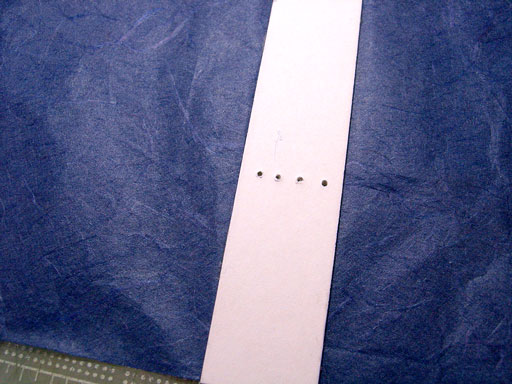
Then I used one sig as a template, found a pointy object (the sharp part of a compass) and poked 4 holes in the center of each signature. (Note to self: Must get bookbinder’s awl.)
Next I cut a spine, and punched holes that matched the holes in the paper sigs. (Used four holes across for the 8 sigs, so I could attach two signatures through each hole.)Then I attached the endpaper to the spine. I wanted this endpaper to run seamlessly under the signatures, so I glued it first and just had to sew around it. Once that was done, I quickly reamed the holes with a needle so the glue would not plug them up.
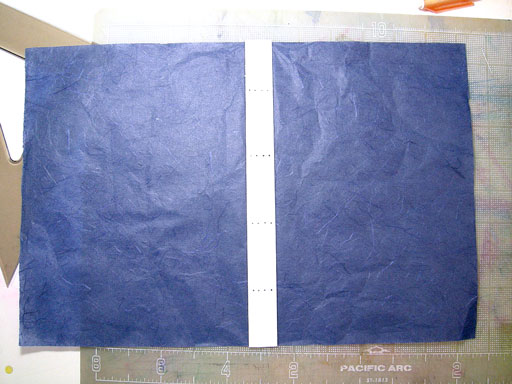
The spine material is heavy chipboard, saved from the back of an Arches pad (the top-glued one, not the block.) This provided me a front and back cover, the spine, and a handy scrap for spreading the glue. I used “Yes” Stickflat glue.
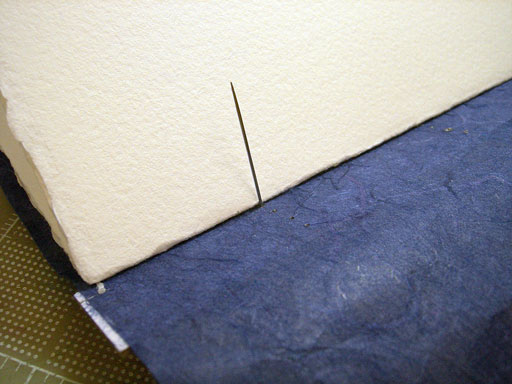
Now to the sewing, done with humble waxed dental floss. You may want to use proper waxed bookbinder’s thread if you have it. The floss seems to get it done for a rough-and-ready book. Pulled off a long, long piece, threaded one end through a needle, knotted the other then seated this knot in a slit cut at the end of the spine. Then, threaded it from the outside of the spine to the inside, and through the outside to the inside of the first sig. Next, poke it through the next hole from the inside of the sig through to the outside of the spine, and now the signature is attached to the chipboard. I continued until all the holes were threaded. Soon as I had the needle on the outside again, knotted it for security and began adding the next signature. This is the needle coming through the first, original hole, ready to be poked through the second signature:
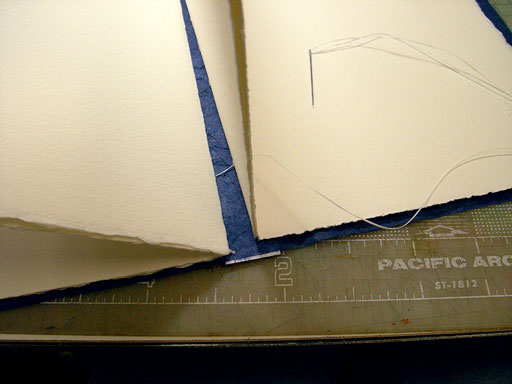
Now the thread is through and ready to weave in and out the holes to finish attaching it:
Sewed again in the same order to attach the second signature, and knotted. Next, added Sigs 3 and 4 in the same way, through the second set of holes. #5 and #6 were sewn to the third set of holes, and finally #7 and #8 in the last set. I needed to add more floss between signatures #4 and #5, so I just tied it off and started with a fresh piece. At the end, I made another slit and wrapped the end in the two slits, then tied off.
Ready to tie the last knot:

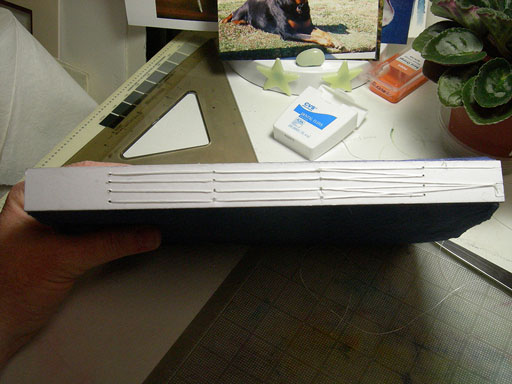
All done sewing!
Now, on to gluing the cover.
Things got crazy at this point, with wet glue you have to work quickly and accurately and I forgot to take many pictures (plus, my hands were sticky). Remember the blue paper is an endpaper, so it’s the inside of the cover. Now I needed to make the outside.
I already had my covers boards cut, two pieces of chipboard 9 1/4″ x 6 1/8″. I had a piece of beautiful Thai marbled paper for the outside, but it didn’t seem strong enough to serve as the “hinges” of the book without tearing, so I added some plain white sketch paper from a pad.
So, first I spread a thin layer of glue on the chipboards, and placed them on the sketch paper. Glued the spine more heavily, to lock in the threads, and stood this upright in the middle. Then I closed the book to make sure the spacing was right and there was enough room for the covers to close. Now it has the form of a book, but it ain’t pretty! Time to make it beautiful.
I cut the marbled paper larger than the book, leaving enough to wrap over the boards, and trimmed the corners diagonally to make the wraps neater. Covered the first half of the marbled paper with a thin layer of glue, then set the skeleton book on the paper. Wrapped the edges over and glued again, and smoothed down the endpaper. Smoothed the face, then closed the book to make sure the cover had enough room to close properly. It did, so it’s time to glue the back and finish.
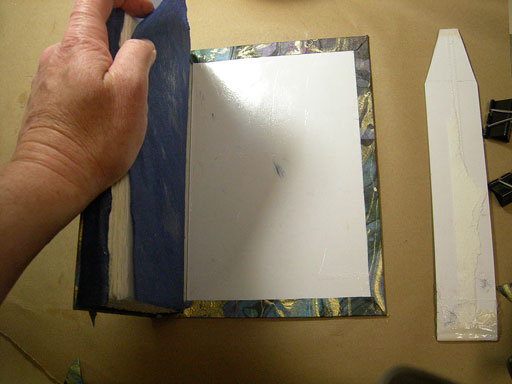 This is about when I remembered to take a picture again! Here it is, with the back edges wrapped and the glue spread. Just need to let go of that blue endpaper and smooth it down. The thing on the right is the scrap of board I was using for a glue spatula.
An unexpected glitch: when I opened and closed the cover initially, the sketch paper buckled and it didn’t quite move right. A few minutes with a thin ruler, creasing the paper and mashing the glue back down, seems to have done the trick.
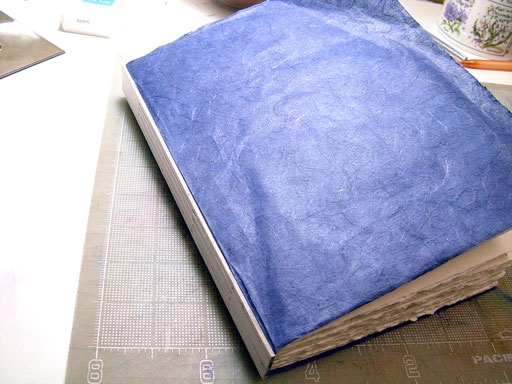
With that resolved: success! It lays flatter now than it did in this pic:

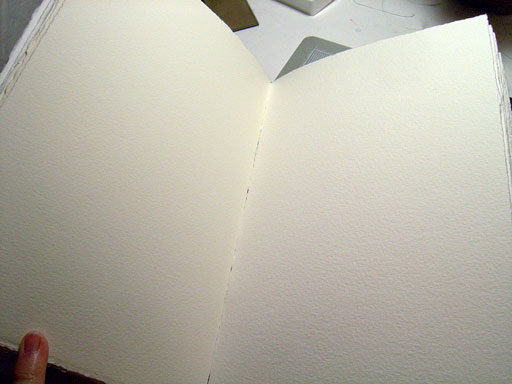
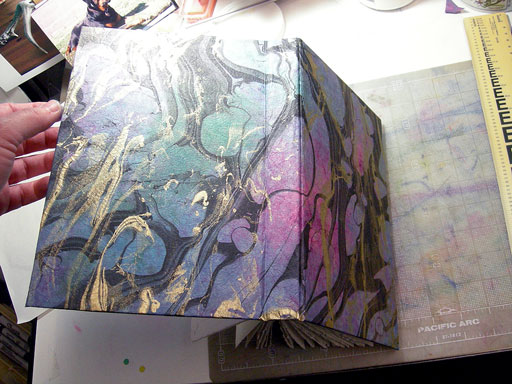
Inside the front cover:

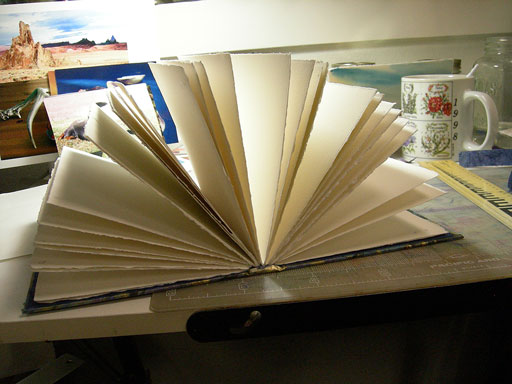
64 pages of cold press papers: Arches, Winsor Newton, and Jack Richeson. And no pesky gaps between the signatures either!
The back cover, with a slip of paper inside until some slopped glue dried:

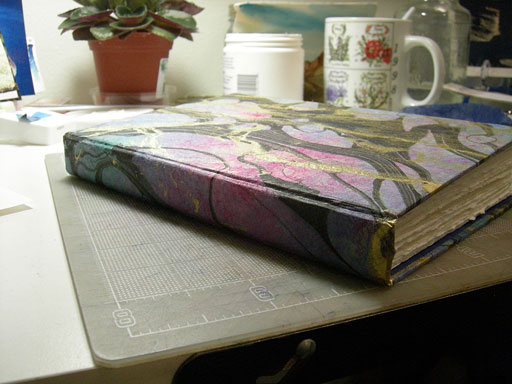
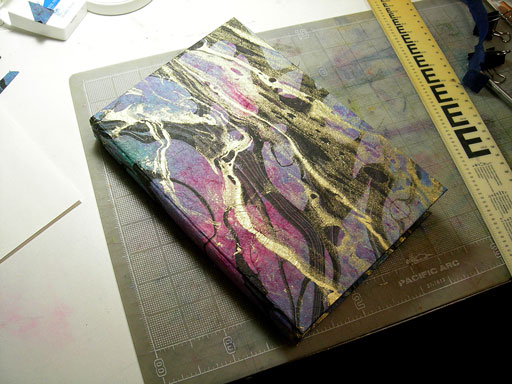
Front and spine views:
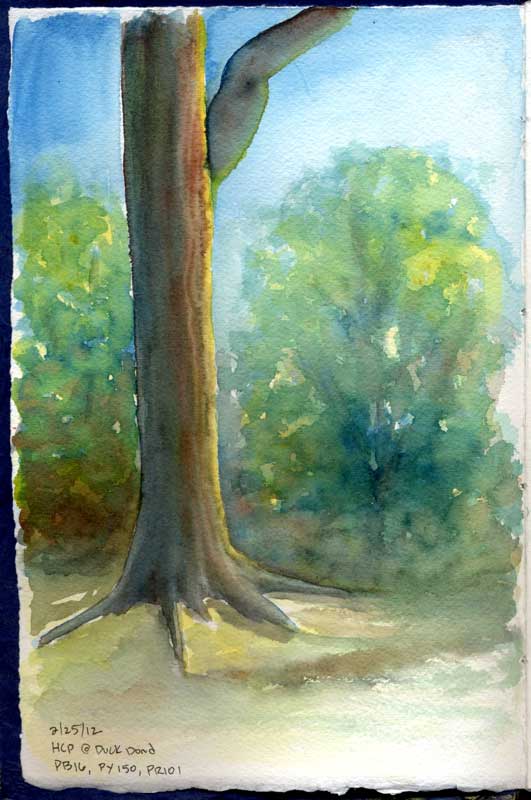 A job well done! To celebrate, I took it to the park and inaugurated it with a moody late-afternoon tree. Would have been nicer if I had planned that heavy branch from the beginning, but c’est la vie. Arches 140lb CP, Phthalo Turquoise, Venetian Red, and Nickel Azo yellow.
Originally posted on WetCanvas.com