 My sketching tools go nearly everywhere with me – what it’s stored in has to be ready for any situation. I wanted something with a little class, very “me,” and just the right size. It had to hold the requisite art stuff, possibly a phone, and some ID. Any number of purses would have done the job, actually, but I’m not really into carrying purses! Some messenger bags looked good as well, but they were too big. Oh, and I didn’t have a huge budget for this either. Nothing out there really was just exactly right. What to do?
Why, make something of course!
An Indiana Jones type messenger bag was the inspiration, so the first thought was to make this out of leather. That was looking expensive though, and I haven’t worked much with leather before. Then I came across Kraftex. It’s the same material as that “leather” patch on the back of your jeans. Did you know those are actually paper? Washable, stitchable paper that looks like leather, and costs a lot less than the real deal. Perfect!!
Kraftex is as tough as nails. It’s much harder to tear than 140lb watercolor paper. It’s super strong, but there’s a hardbound book going in there. My only concern was that the entire weight in the case would hang from a small point on each side with this weight transferring through the bottom. I therefore made the bottom double thick to ensure nothing ripped in practical use. A single thickness would be enough for the rest of the case.
Instead of cutting, I tore the paper to size. Tearing leaves a deckle edge, similar to watercolor paper, which would look nice on the finished case. Kraftex is a bit like thin shirt cardboard in texture, and comes in three colors. This is the medium tan color. (The others are black and a warm white.) Did a test run by making a pocket sketch kit and learned that it not only takes ink very well, it also gets a wonderful patina from an ink wash and rough handling. What more could I ask for? On to the fun part!
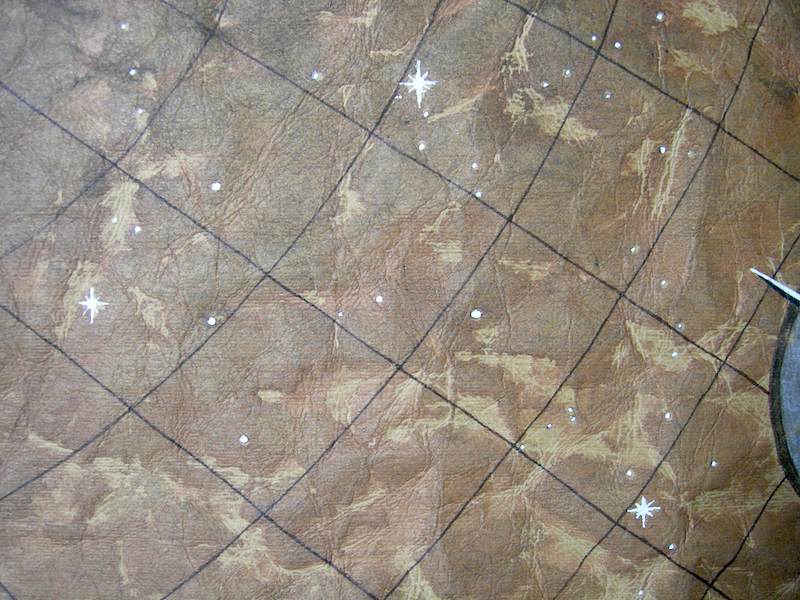
First, the design. I am an astronomy geek from many years back, and really wanted to say something about that on this case. So, the top flap features a compass rose overlaid on an astronomically-accurate map of the eastern sky at summer solstice. I drew the compass rose on a separate sheet and transferred it to the Kraftex with graphite. (Good decision! Kraftex does not erase well AT ALL. Any extra pencil lines would have been very difficult to eradicate.)
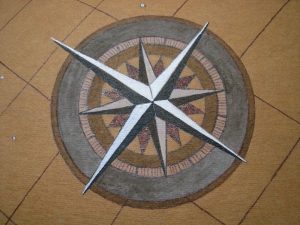
Here’s the compass rose in progress. I inked this with a crowquill and India ink (black, sepia, and brown) and some white acrylic. The gray ring is sepia and white… this happened because I put in a shadow with the pen, didn’t like it, and had to get some opaque color on there to hide the goof!
That was the first art on the project, before adding the texture. Have you ever spent a couple of hours carefully drawing and inking something, and then crunched it up in a ball on purpose? That’s what I did though!
Not to worry, it looks fabulous. It’s actually hard to crumple, and I had to crease some places specifically to ensure that the texture was even. Once it all looked good, I masked the compass and stars, and brushed the surface haphazardly with thinned down ink. The aim was “old worn leather” and Kraftex does not disappoint. It’s mostly sepia on the outside, and brown on the inside for a little variety. 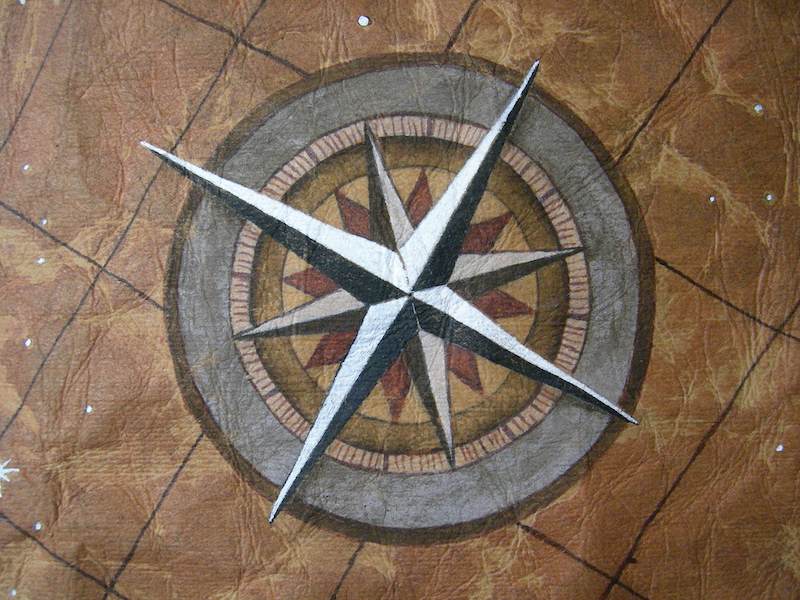
Once all the pieces were inked and the design finished, time to assemble it. You can machine-sew Kraftex, but I would suggest a robust machine. It’s like sewing thick denim. My light-duty sewing machine struggled with sewing two pieces together and I was afraid to attempt the triple-thick section where the sides met the bottom. (I did hand-crank it through here to save stress on the motor, but that was probably bad for the machine! Thankfully that was only a few inches of seam, total.) After machine sewing the stress-prone areas, it was time to work on the closure. This had to be handled while I could still work easily inside the case.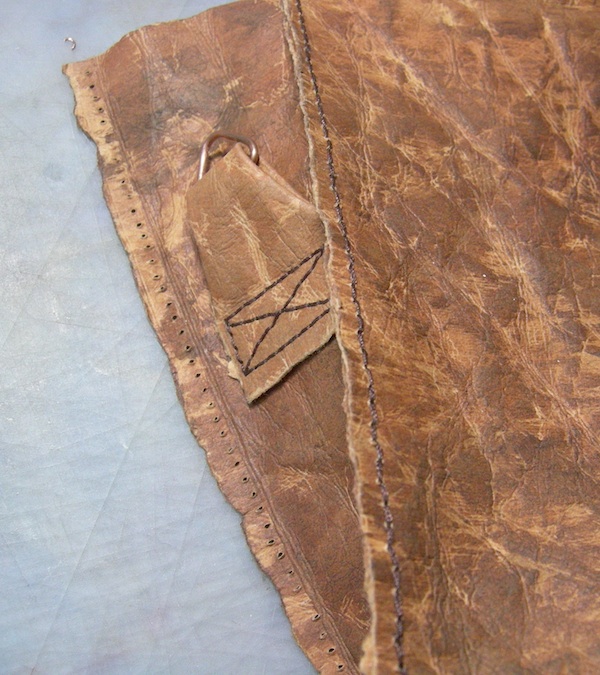
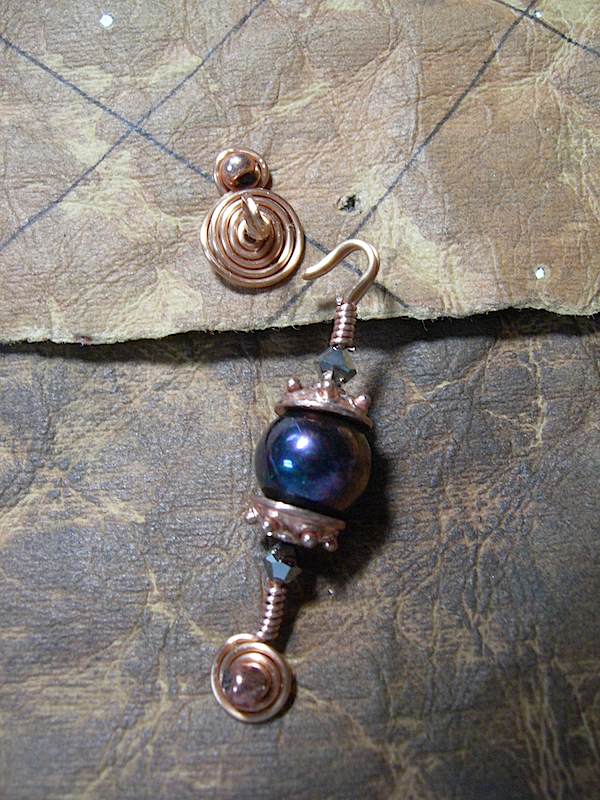
I made the closures with wire and beads, then attached these by sewing a small glass bead through the spirals. There’s a tiny bit of Kraftex on the inside to serve like a washer, and add some strength. The copper wire is actually too soft and I may end up remaking these in the future, but they’ll serve for now. They certainly look just like I envisioned! [UPDATE: I did redo these twice, once to improve functionality and once to change out the beads. The original design tended to get caught on things and un-spiral, leading to a lot of fussing around with the closures. I like my tools rough and ready! Redesigning and work-hardening the copper led to a big improvement in stability.]

That is a hole in the Kraftex, to the right of the eye loop. I had them in one position then changed my mind… once you put a hole in Kraftex, you have a hole forever. Live and learn.
With the closures complete, nothing left but to stitch up the sides. This was the easy part! I hand sewed it with two needles as one would sew leather. 
First time I’ve done that, forgive me, it’s a little crooked! But the case is meant to be vintage-looking, so it doesn’t seem too out of place. Four straight seams, a strap, and it’s done!
Here’s the star map, the sketch tools that live inside, and my favorite palette:

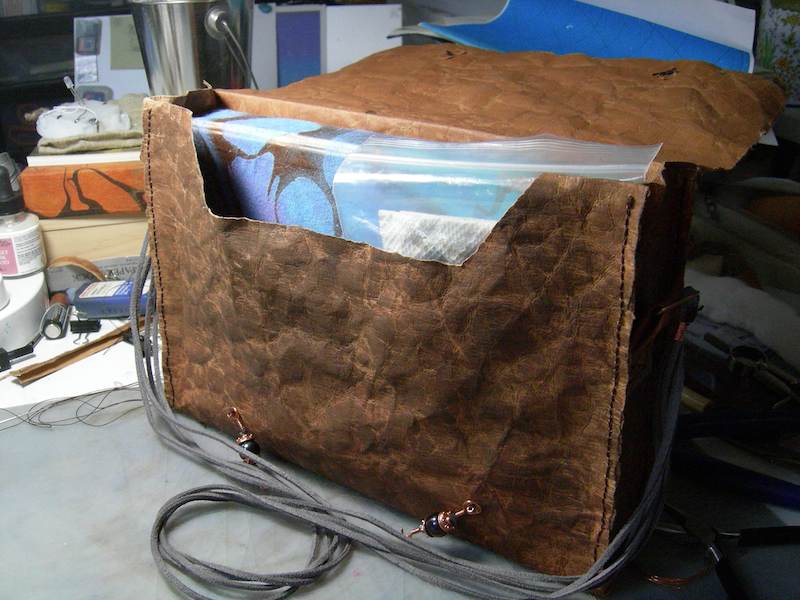
Finished size is 7″ x 10.5″ x 2″ on the outside, 7″ x 10″ x 2″ inside.