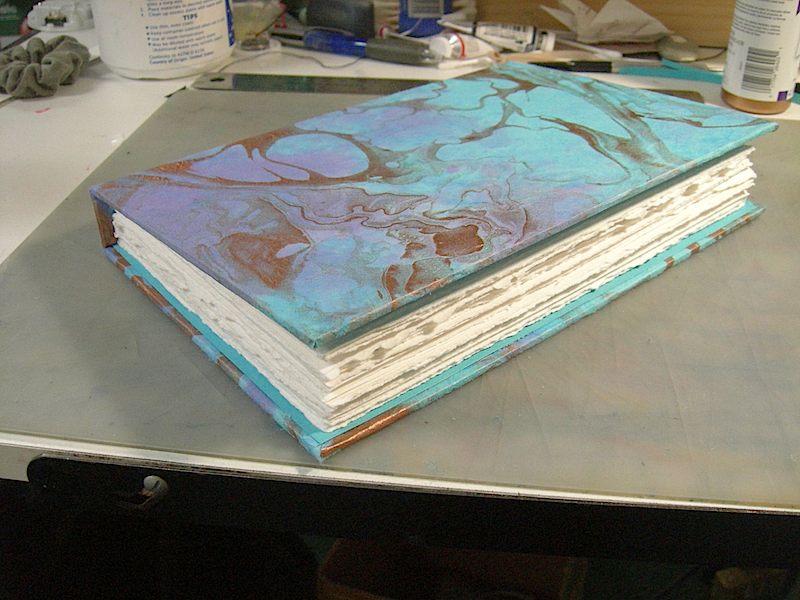
 Finished a new sketchbook tonight, and took a few pics. This is my ninth handmade sketchbook and fifth hardbound. The first hardbound book I made in Feb 2012 used a sewn binding that is closer to traditional bookbinding. Since then, I experimented with different options; all five books look quite alike standing together on a shelf, but the underpinnings differ – and some fared much better than others! The last one worked very well though. Except for a few scuffs and dings, it looks as good as the day I made it.
That one was much easier than the first book linked above, and yet held up to daily use and abuse for the 6-9 months it takes me to fill one of these up. It’s really Rosemarie Lütken’s idea done with fancier materials, and looks/feels like a professionally bound book when it’s done. Here’s how I did it.
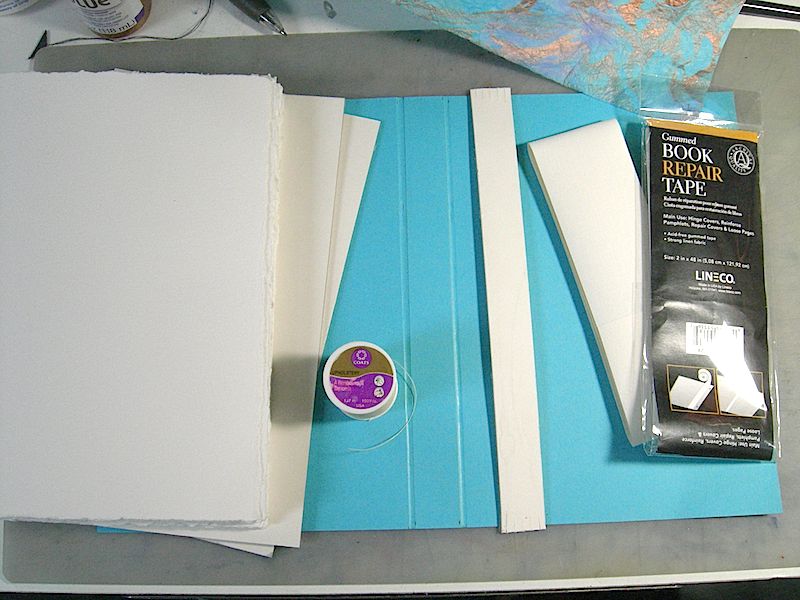 First, the materials. I really like 6″ x 9″ books (even though it means there’s some waste from a 22″ x 30″ full sheet.) So, prior to this pic I tore down three full sheets of Fabriano 140lb Cold Press into 15 pieces 9″ x 12″ each, then folded them in half. These were arranged in 5 signatures of three sheets each. That’s the stack of paper on the left. Underneath it, two pieces of heavy chipboard 9.5″ x 6.25″ which are the front and back covers. Next, heavy-duty upholstery thread, and a chipboard spine 7/8″ x 9.5″ (The width will vary if your book has more or less paper than mine… make it a little wider than the stack of paper you plan to bind.)
On the far right, Lineco gummed repair tape strengthens the paper where it will be most likely to rip. At the very bottom of the stack is a piece of Canson paper, 9.125″ x 14″, which will become the endpapers of the book. (I’ve already embossed it a bit where it will have to fold next to the spine.) And last but not least, just a bit of the marbled Momi paper at upper right, which will be the outer wrap. Not shown, Aleene’s tacky acid-free glue. I would have preferred proper bookbinder’s PVA, but the local shop has been out for weeks so Aleene’s is going to have to do.
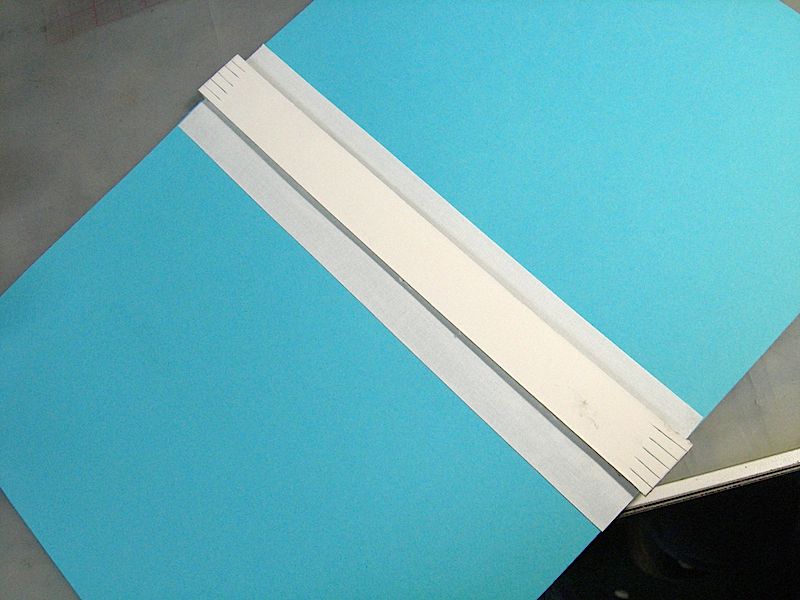
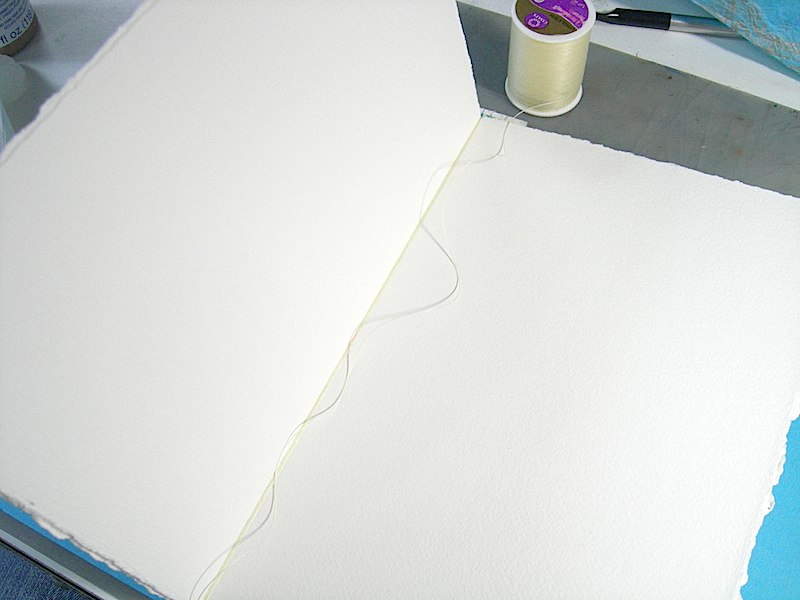
To start, apply the bookbinder’s tape down the “spine” area in the middle of the endpaper, and glue the spine on top. Turn over and burnish the tape and paper down at the sides, to make it easier to fold the book closed when it is all assembled. Now it’s time to start attaching the pages.
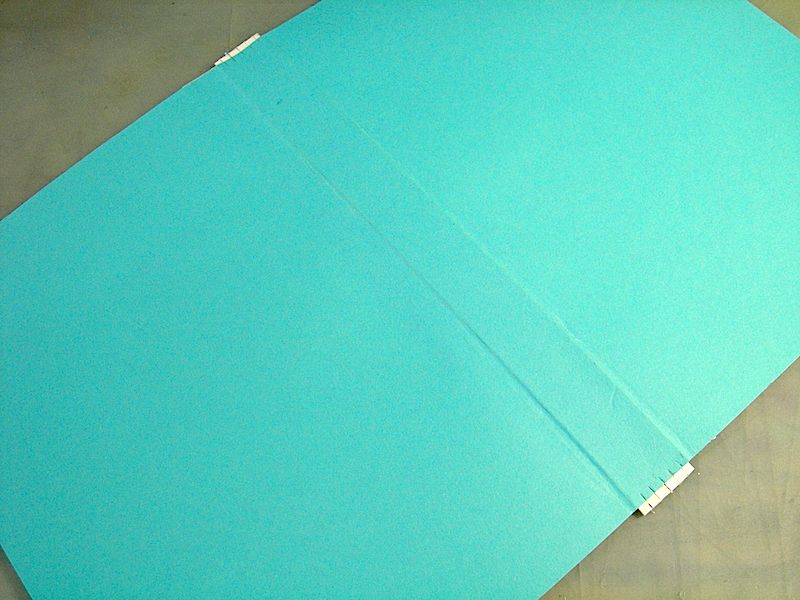
NB – attach the sheets to the “paper” side of this arrangement, as seen in the second pic. The ugly side should be down as you’re attaching signatures. That way the spine ends up inside as part of the cover when you’re done, and the endpaper runs contiguous beneath all your pages.
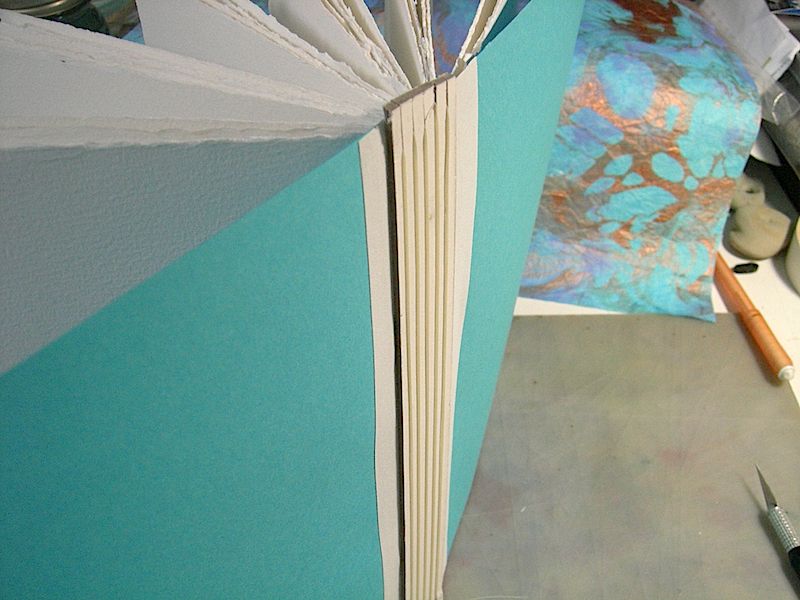
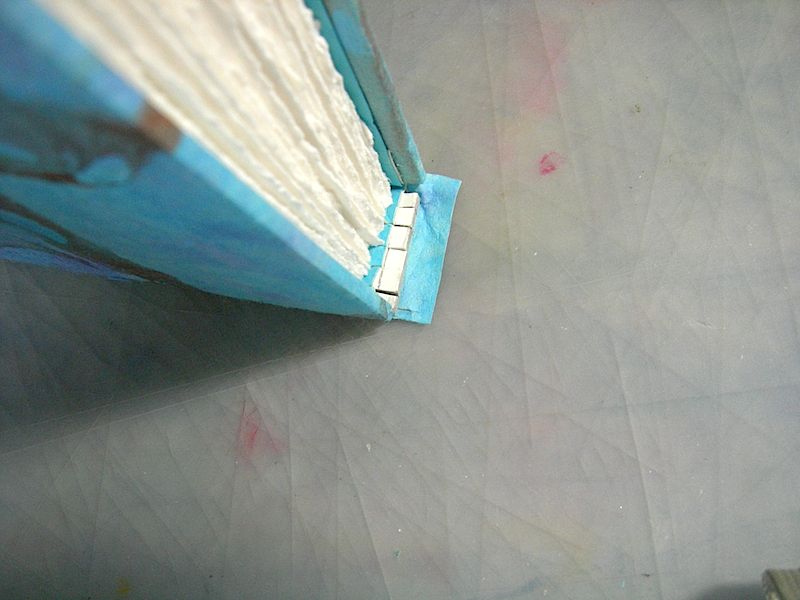
 I have already notched the spine evenly at the top and bottom. There’s simply a slit cut for each signature I need to bind, evenly spaced. The thread used for wrapping will seat in these slots, keeping the pages where I want them for the life of the book. So, tie a big knot in the end of the thread, seat it in the first slot, and simply wrap the thread around the center of the signature. (If you’re not familiar, a signature is several sheets stacked up and folded as one. I have three sheets per signature.) Wrap the thread several times, making sure to seat it deep in the slots and pull firm with each wrap. (Caution: not so tight as to bend the spine. If it’s bowing at all, loosen up!)
With the first sig wrapped, I tied a knot to secure it (in case a thread breaks, the whole book won’t unwrap!) Then, repeat for sigs 2-5.
Once all the signatures have been wrapped in, tie off the thread and make sure it is firm, so it can’t come loose and let the pages fall out. At this point, the pages will look like A Real Book, though a coverless book with the endpapers flapping loosely. Here’s the spine and finished threads. Now we can set this aside and start the cover.
 You’ll need a piece of paper or fabric about an inch larger than your book’s total dimensions. This means the total length/width of the front and back covers, plus the spine, plus a half-inch or so for creasing where the covers fold, and add an inch to all that to be extra sure there is enough. A little bigger is fine, the extra will end up under the endpapers so no harm done. I’m using marbled Momi paper, you can use anything that suits your taste and is and thin enough to fold tightly over the edges of the chipboard.
To begin the cover, lay the paper/fabric face down, and place a strip of the gummed tape down the center. I am using 2″ wide tape, which is wide enough to cover the entire spine and overlap the front/back. The point is that it needs to cover the crease where the covers bend. If you have thinner tape, just put a piece on each crease. (Book repair tape is well worth obtaining, if you don’t already have it. Most of these materials can be substituted or improvised, but in 5 books, the only ones that didn’t fall apart were the ones with this tape. Every time I tried to support the hinges with extra paper, it wore through and ripped long before the book was full.)
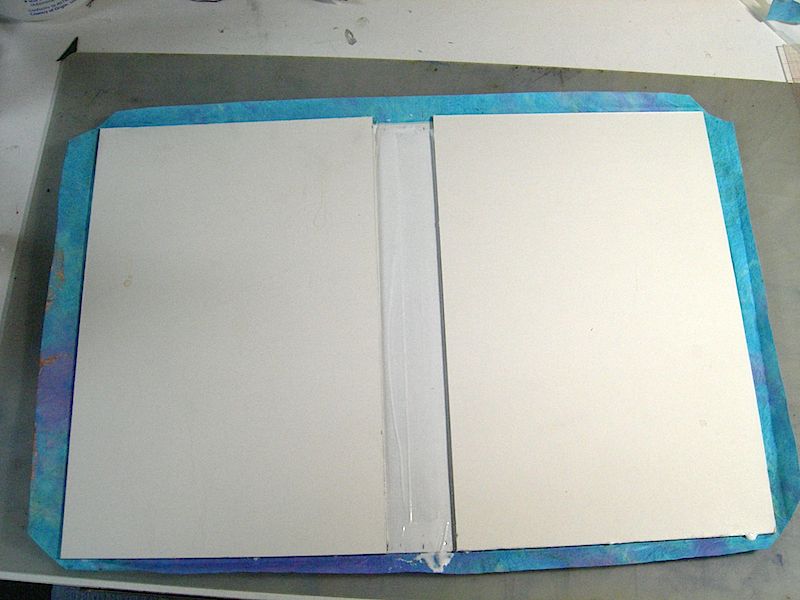 Once the tape is in place, mark off where the spine will go, then add 1/4″ on each side. The front and back covers will butt up to this mark. Trim off the corners at a 45 degree angle, and it’s time to spread the glue! I find it easier to place a thin layer of glue on the covers, rather than the paper. (Momi is thin and a little awkward to handle when gooey with glue.) Place the covers carefully in place, make sure they are straight and at the marked distance from the spine. This pic shows the cover boards in place, just before wrapping the edges over.
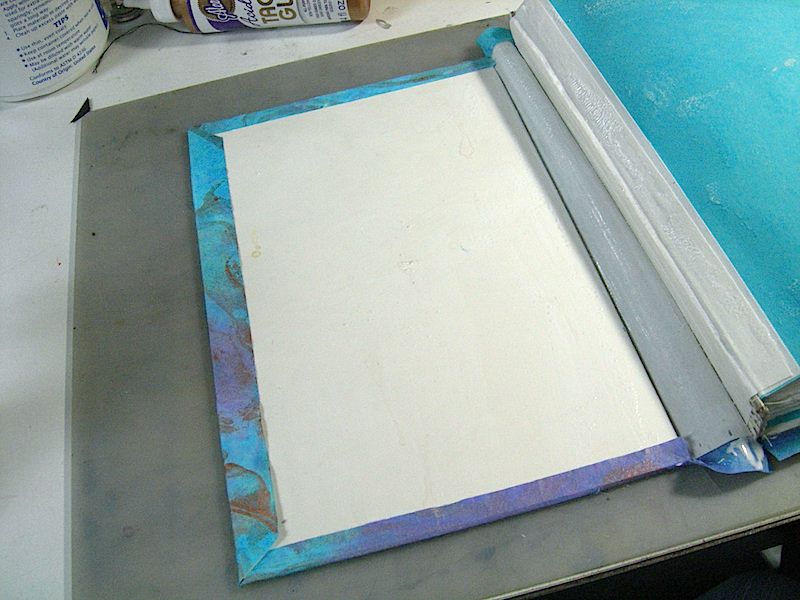
To wrap the edges, cut a slit at the edges of the spine, add a bit of glue to the cover paper and simply pull it over and stick down around all the edges. The angle cut on the corners will allow for it to wrap neatly without a blob of extra paper. You’ll need to leave it sticking out at the spine for just a little while longer.
This is where the entire book comes together! You’ll have to work quickly and it helps to have extra hands available, if anyone can assist. Spread a thin layer of glue on the front cover, including the cover paper you wrapped over a moment ago. Put a good coat of glue down the spine, fold the pages and endpapers closed, and place the spine in position. Now you’ll have an open book, with the pages sticking up in the middle.
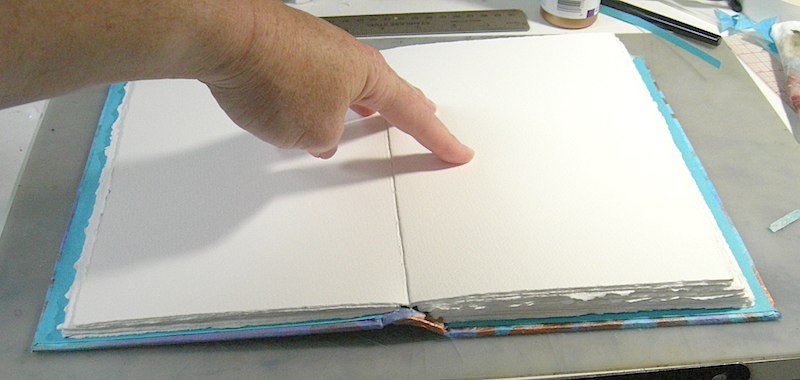
The next part is the only really tricky part of the process. You need to lay the endpaper down and smooth it. That’s simple in concept but takes a little finessing, since the endpaper will buckle as soon as you close the book! The solution is to just work with it, carefully, and especially to crease the endpaper firmly into that 1/4″ gap you left between the spine and the covers. This will help the hinge to bend without the endpaper needing to slide around and buckle, or worse, rip. (How would I know that might happen? )
 Bend the cover all the way closed, and all the way open, multiple times until you are sure it’s placed just right. It helps to have glue that does not dry quickly for this stage, as you might need to lift and lay the endpaper back down multiple times.
Eventually, it will be situated just right, and then you can do the same to the back endpaper and cover. Don’t worry about minor buckles and wrinkles, these will flatten out as the glue dries. Just be sure you can open and close the book normally. One you’re confident of that, check and add glue anywhere it isn’t quite sticking. Check the endpaper; if you sized it generously, us an Xacto or razor blade to trim to a neat finish. Almost done! Just one more thing.
The last step is to deal with that bit of paper sticking up at the spine. We left it hanging out, because it needs to wrap over and hide the slits where the thread is seated. Just trim this to fit, add a dab of glue, and wrap over. Do the other side and voilà… the book is complete! Thanks to the binding, it will open as flat as you please.
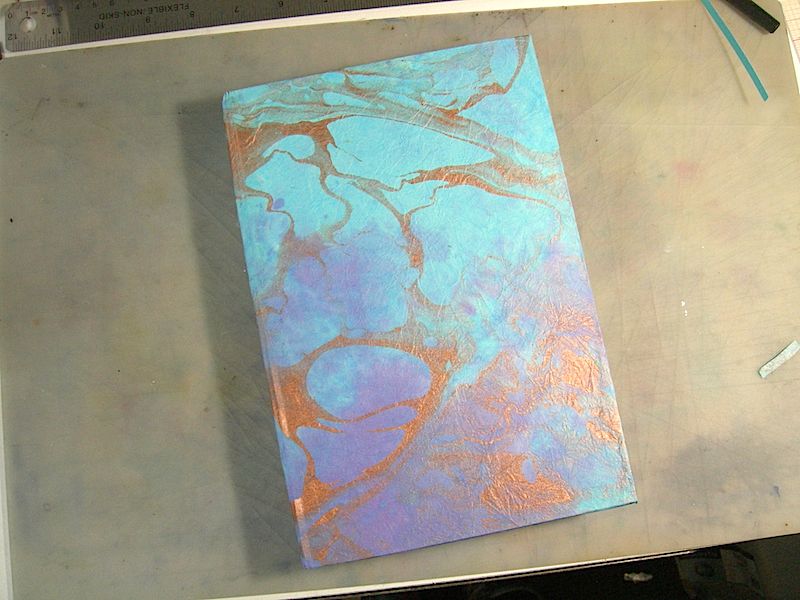
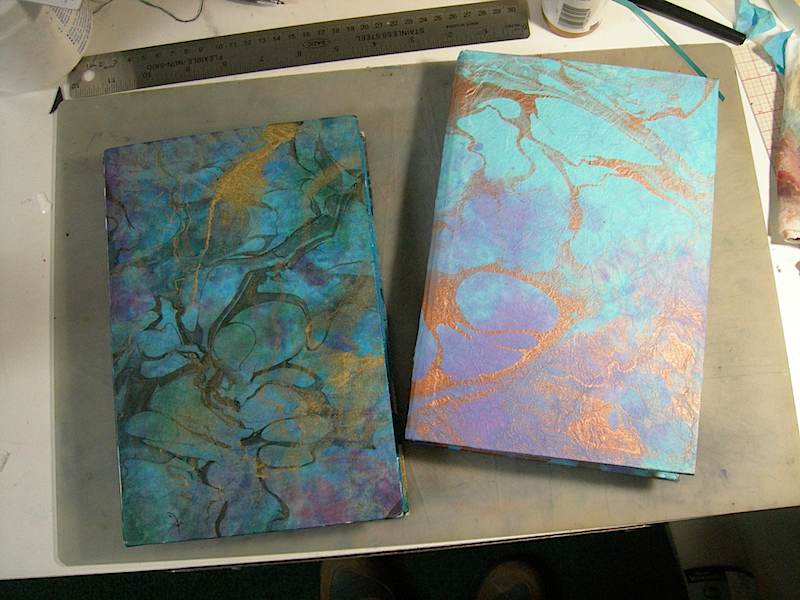
Here it is with the previous book, which is completely full of sketches now and soon to retire.
 I won’t kid you, this is an enjoyable process, but not a super-fast one. It takes me multiple evenings prepping things (like tearing all the pages out of full sheets) plus a good several hours of steady progress once the time comes to actually assemble it. It’s not really difficult though, and the books turn out so nice, it’s well worth the time. (My other half was just admiring the book this morning, and was very surprised to find out it was the project I’d been absorbed in the day before. He thought I’d purchased it!) Another bonus, you get to choose the paper it’s made of. I have surely spent less time making these books, than I’ve spent trying to find a commercial sketchbook with paper I like.
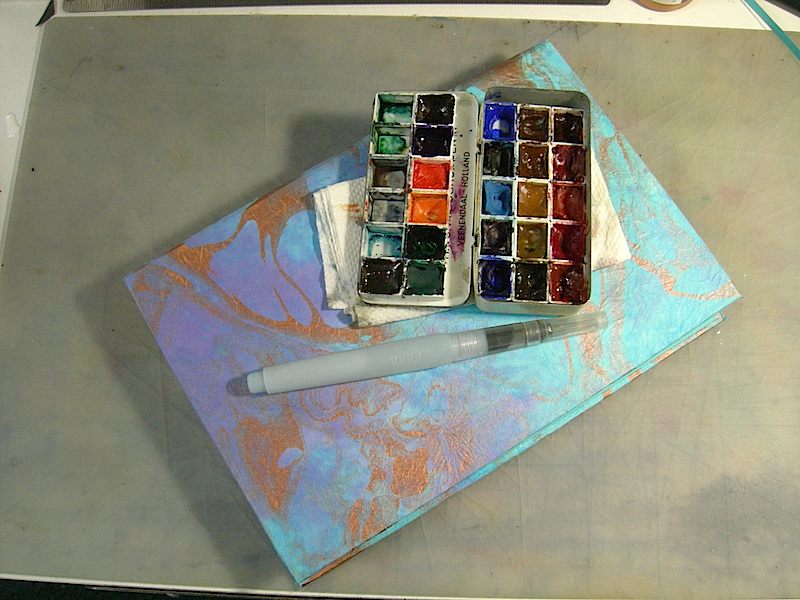 Once you’ve made it to this stage, prop it up, pour your favorite beverage, sit back, and enjoy the sense of accomplishment. Or better yet, if it’s not a gift for someone else… head out and paint!
Originally posted on WetCanvas.com.